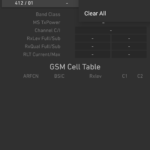
Network Signal Guru is a new app that gives TONS of information on the cellular networks that you are connected to. Unfortunately, the Nexus 6P by default is lacking one of the most important functions of the app: Band Locking. Huawei crippled this feature from the factory.
Band Locking enables you to allow your phone to only search for service on the bands that you specify. This is important if you are trying to identify specific coverage in specific locations, or do other testing with your phone. Additionally, if you find that one band is severely congested, you can force your phone to stay on a different particular band.
Below is a simple guide on how to get this capability. This assumes you already have a working Nexus 6P with TWRP Recovery already installed (software version not relevant), and also assumes a rather decent knowledge on flashing / modifying your phone. This also assumes that you have ADB and Fastboot already installed on your computer. You will need to wipe your entire device, so make a complete backup before starting.
- Download the NMF26F image for the Nexus 6P from here.
- Once downloaded, extract the ZIP file to a location you remember.
- Reboot your device into Recovery Mode, and wipe the entire system. You want a completely blank and wiped device.
- Reboot the device into the Bootloader.
- Navigate to the directory you just extracted the ZIP to, and execute the flash_all.sh script from a shell on your computer. This will install Android Nougat 7.1.1, build NMF26F onto your phone.
- Once the installation has completed, allow the phone to reboot. At the initial setup screen, reboot into the Bootloader again.
- Download the Nexus 6P Engineering Radio from here.
- Extract the radio into the same directory that you have been using.
- At the Bootloader, issue the commands:
fastboot flash radio radio.img
fastboot reboot - Allow the phone to reboot to the initial setup screen once again. Once there, reboot the phone back into the Bootloader.
- Download TWRP Recovery version 3.0.3-0 from here.
- Place the TWRP recovery image in the same directory as your extracted image above.
- At the Bootloader, issue the following commands:
fastboot flash recovery twrp-3.0.3-0-angler.img
fastboot reboot - Allow the phone to reboot to the initial setup screen once again. Once there, reboot the phone back into the Bootloader.
- Select Recovery Mode from the Bootloader screen to boot into TWRP Recovery.
- Download SuperSU from here.
- Copy the SuperSU ZIP to a flash drive, and insert the flash drive into your Nexus 6P (via USB-C to USB adapter).
- Install the SuperSU ZIP from the flash drive.
- Reboot the phone.
- Continue through the setup process for the first time. Ensure you set the phone up completely from scratch, and do not recover anything from a previous install (either through TWRP Recovery or through the stock Android setup tool).
- Sign into the Google Play Store, and download Network Signal Guru.
- Start Network Signal Guru, and grant it Root permissions.
- You’re done! If you have completed all of the steps correctly, you should now see the Band Locking option enabled in the Magic Wand menu. Additionally, RAT Locking will also work natively within the app, and will not send you to the phone’s stock internal menu.
You may not have to be quite as thorough as I was to achieve the same success, so feel free to experiment. However, I do know that when I was on different Nougat build, no combination of trying to flash the radio to my then-current setup would work. The above steps are the only way I could reliably replicate a working setup.
Now, I have not been able to extensively test this radio in the real world at this time, nor am I where I can test the features of band locking in a real-world environment, as I am out of the country at the moment. As soon as I am able, I will update this page with my results. Until then, anyone that has feedback is requested to post in the comments below.
EDIT: It has been reported that if you have a phone on a previous version, and take the OTA update to 7.1.1 (Build NPF10C), that you can start at the sixth step above, skipping a full wipe and flash of the OS.
For the original version of this guide, please proceed here.
I am not responsible for anything that happens as a result of the instructions on this page. Proceed at your own risk.


Has anbody else flashed the radio and wifi calling stopped working? Any way to fix this?
Seems to work however I was able to skip most of the steps. Not sure if this would work in every case but it did for me…
1. Install radio version 02.47 (From mmb29n)
fastboot flash radio radio-angler-angler-02.47.img
2. Reboot and verify cellular connection
3. Install engineering radio
Does anyone know the MSL/SPC for this radio? The device specific MSL no longer works when using 02.50L. I would love to use a modified PRL along with Network Cell Guru however this is currently a trade off as we are unable to use QPST, CDMA Workshop, or anything else without the pre-defined MSL in this radio version.